After a long period of E36 ownership, it has become clear that the power steering leakage isn't going to fix itself. Which is a shame, because I was really hoping it would. So failing that particular miracle, a project was set in motion to permanently tame every single drop of ATF. This is that story...
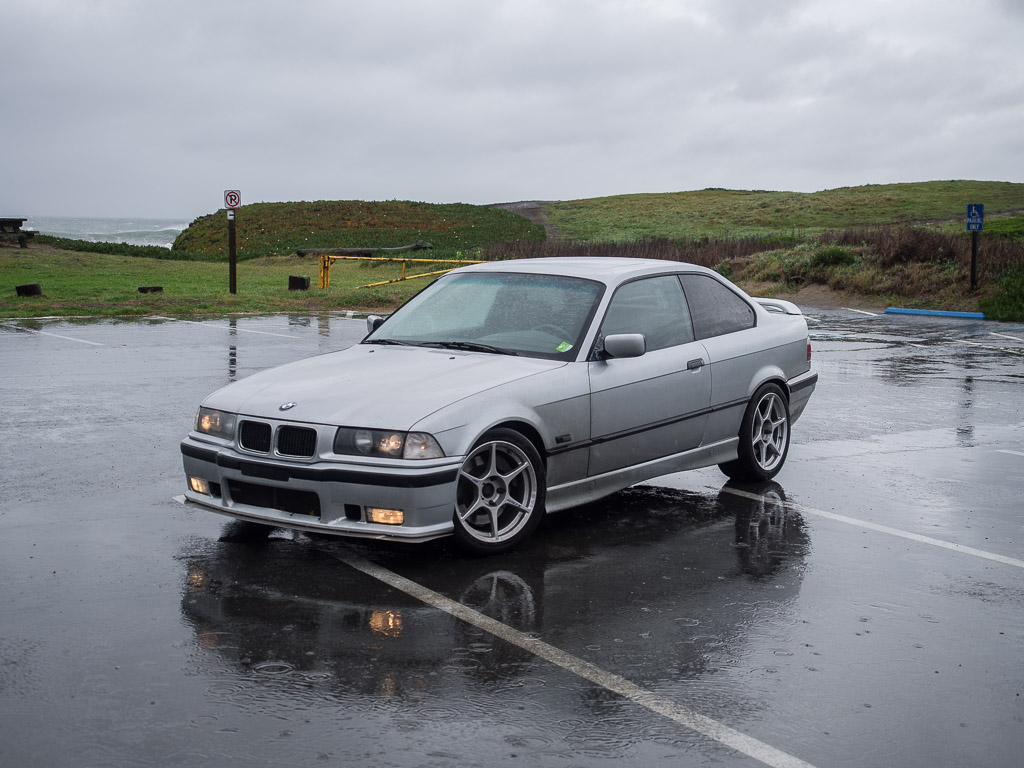
Figure 1
Stopped at San Gregorio State Beach in the rain.
Here is the culprit. A 1996 328is, just shy of 200,000 miles. It is daily driven in the mountains, it is tracked, but well treated. The engine is completely stock and original, so is the steering system, which is the problem.
The first order of business was a new steering rack. We'd heard great things about the non-M Z3 rack, so one of those was obtained. It is a rebuilt one from BMW. After that the car was very taken apart.
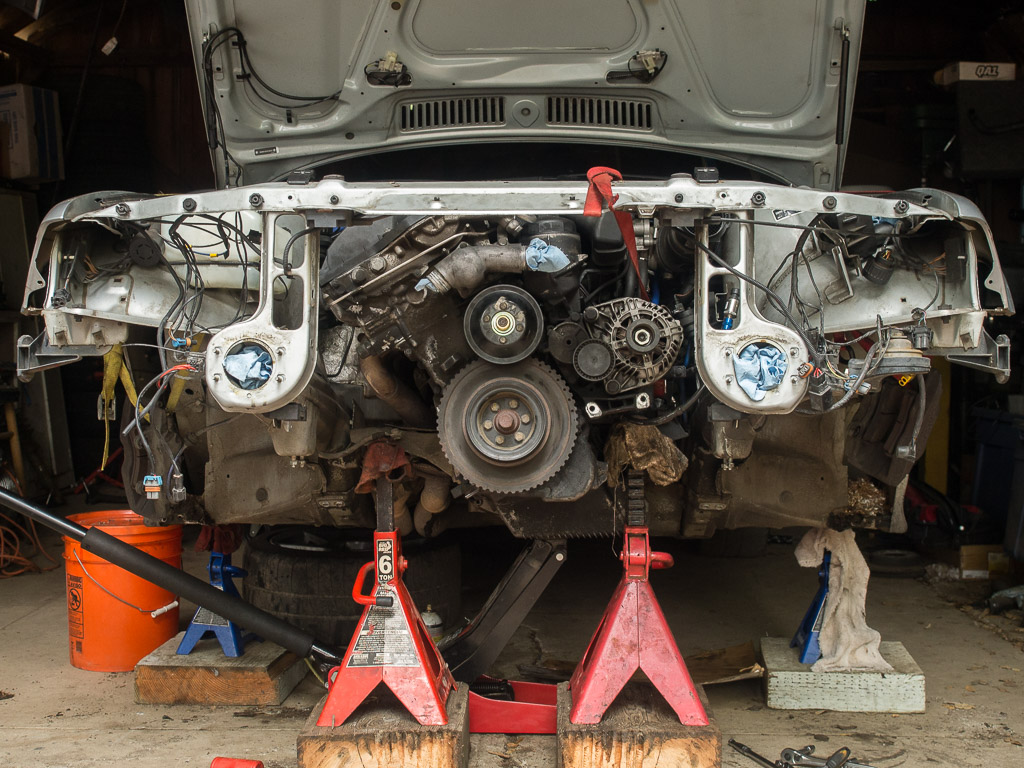
Figure 2
Who needs front suspension anyways.
Once the rack was taken out, we compared it with some others, you can read more in this thread. Suffice to say, the new rack was better, and cleaner.

Figure 3
Ordered cleanest to dirtiest.
We also had a look at the bottom end and replaced the oil pan gasket while it was accessible. Everything looked pretty good. There were no cracks in the oil pickup tube and the oil pump nut was replaced, torqued, and safety wired. I think the risk on the M52 is much lower than the S52, but why not... it's right there and easy to do.
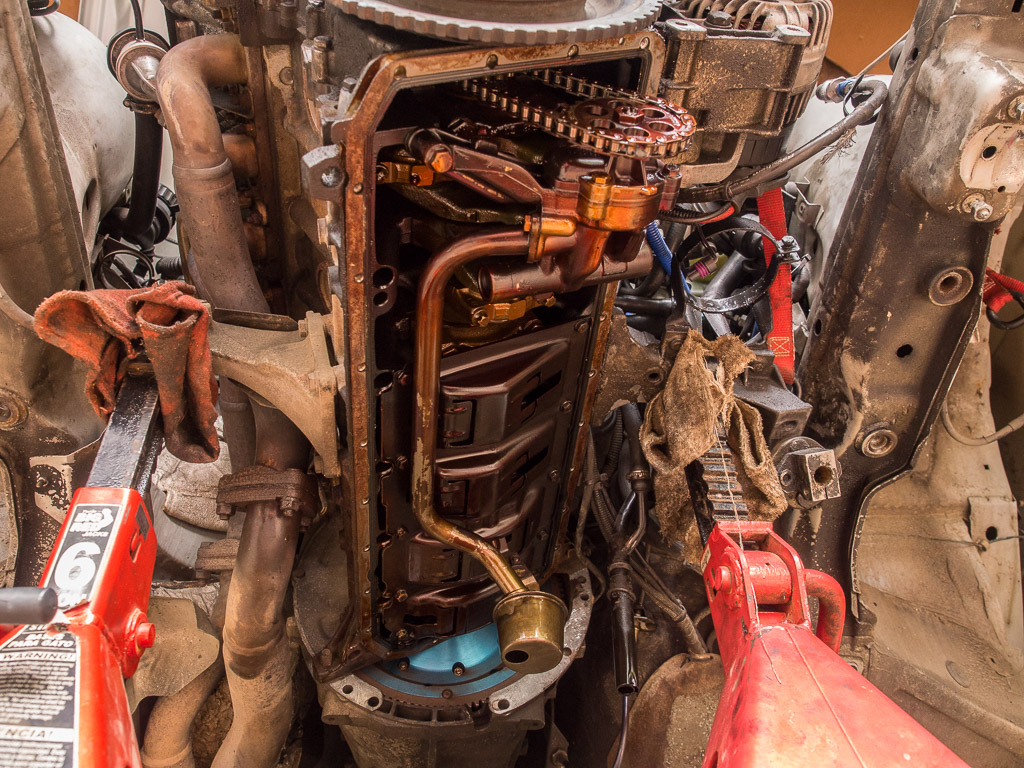
Figure 4
The amber color is caused by constant contact with oil.
A custom system had been planned however, we needed to take the car apart to really get proper scope on what was required. The state of the original power steering system was pretty abysmal. As expected everything had to go. The pump, reservoir, rack, all the lines. Everything.
Orders were placed for the rest of the plumbing and the custom parts were started as well. The first custom part was the reservoir.
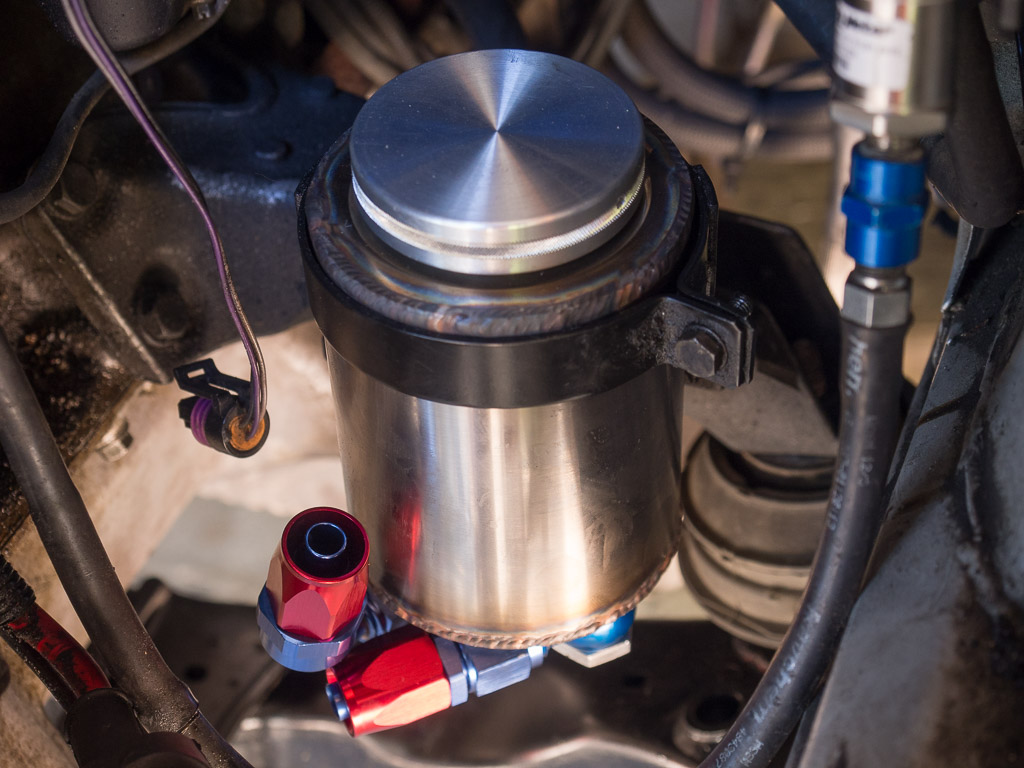
Figure 5
Custom machined power steering reservoir.
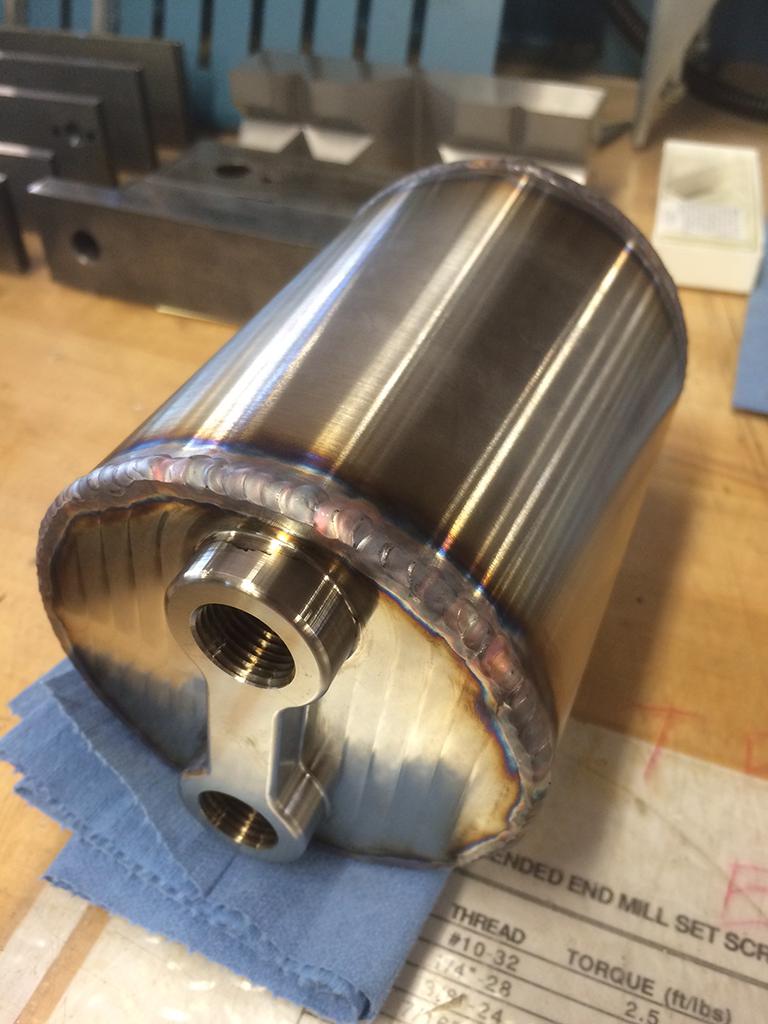
Figure 6
Two tapped holes for banjo fittings.
Arriving by parcel was a fluid cooler and a filter. Also a bunch of other plumbing items which are in the parts list at the bottom.
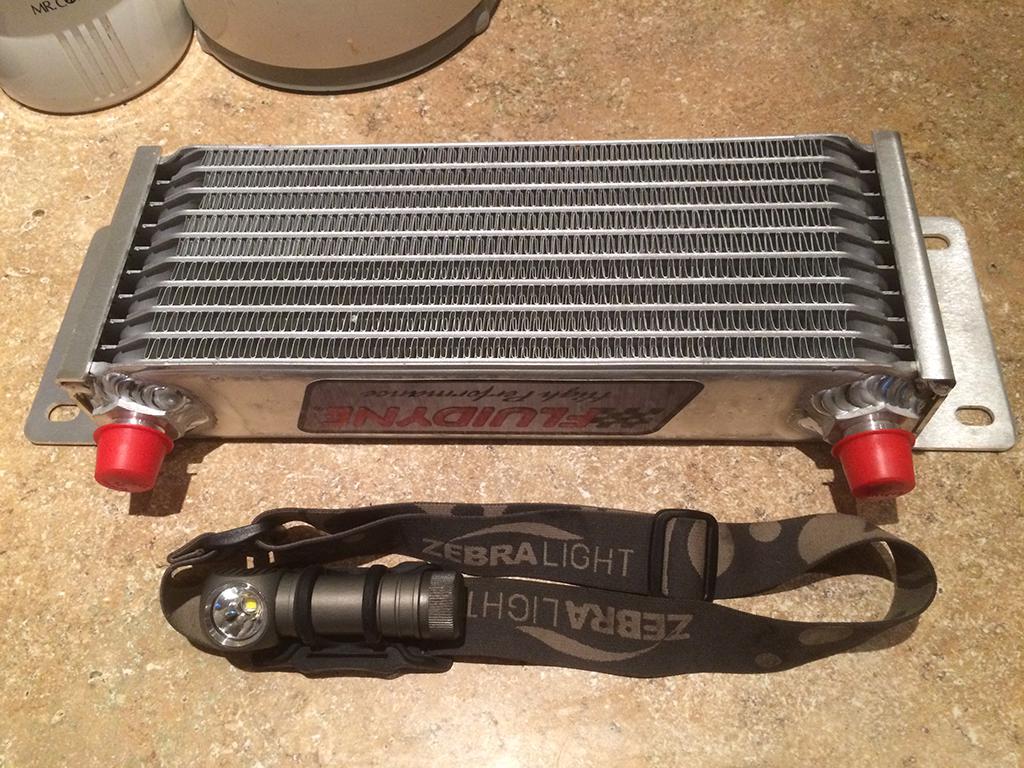
Figure 7
A truly overkill oil cooler for the power steering.

Figure 8
And a truly overkill filter to go along with it.
Measuring the inner diameter of the OEM hosing it was decided that 8AN matched reasonably well for all the low pressure runs. After cutting open a high pressure hose we decided to use an OEM one. It has a banjo fitting on both ends so it should be reliable, and the pressure it carries is high enough that most home-made custom hoses can't deal with it (up to 1,750 PSI).
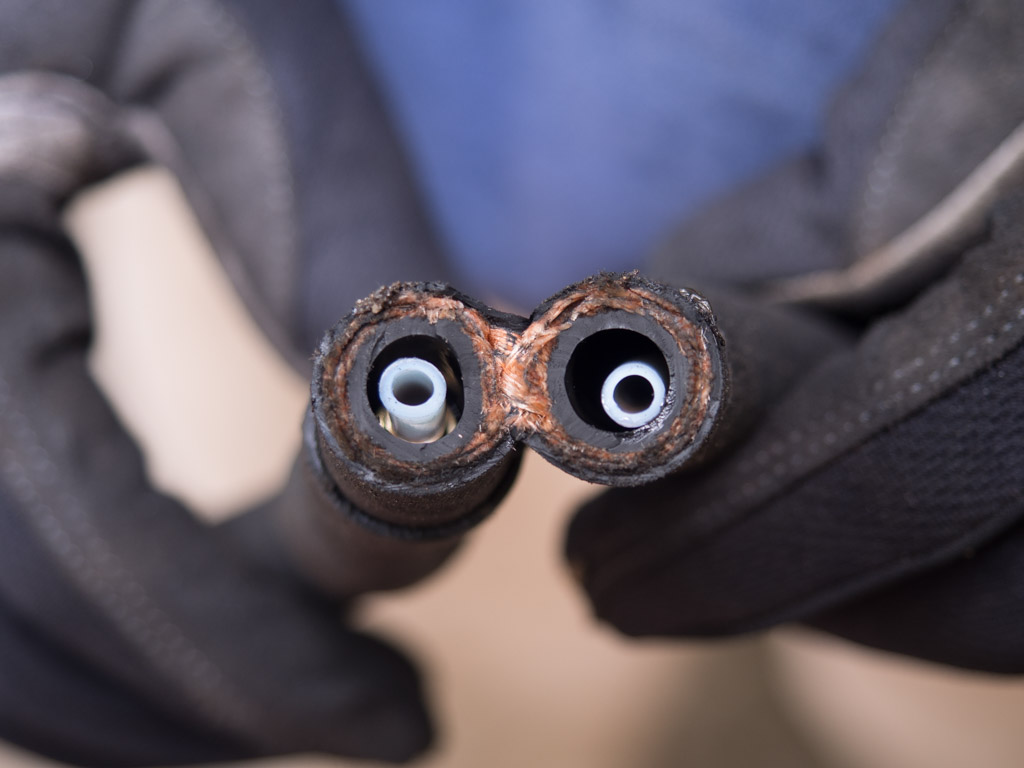
Figure 9
Looks like these lines are mostly sheathing and the high pressure component is quite small.
The M3 PS pump is better for these custom builds because it has a threaded hole for the feed rather than a barbed end. For that reason and others one of those was ordered. The offset is wrong for the 328is so the belt doesn't line up, but the bracket can be milled down and then it fits appropriately. This 328is oil pan also has the bolt hole for the pump just like the M3 does.
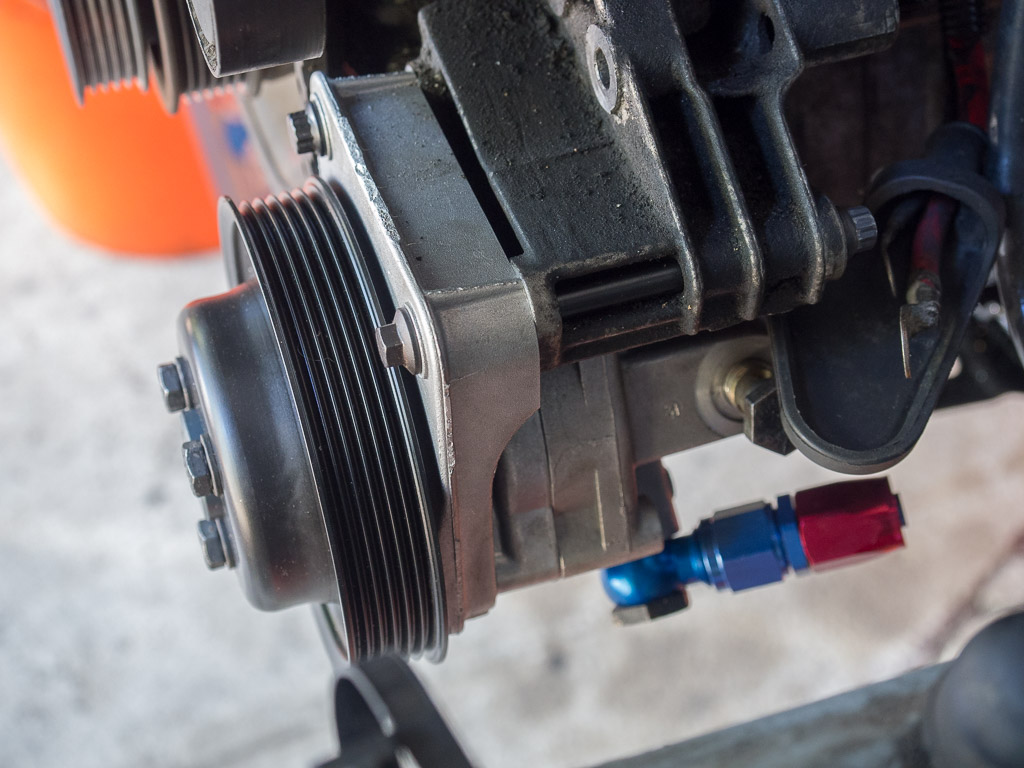
Figure 10
The mounting face of the M3 pump bracket had to be milled down by almost an inch to line up properly.

Figure 11
Mid-right of this photo you can see the mounting ear lined up with the oil pan hole. 328is pumps do not have this ear, but the pan is the same as an M3.
Fitting the cooler and filter was a challenge. This car is slowly becoming a track-only car, it hasn't had air conditioning for awhile. The condenser, pump, lines, and front fan are all gone. This opens up a lot of space in the front to build a custom crossmember and duct system. A perfect place to mount some stuff.
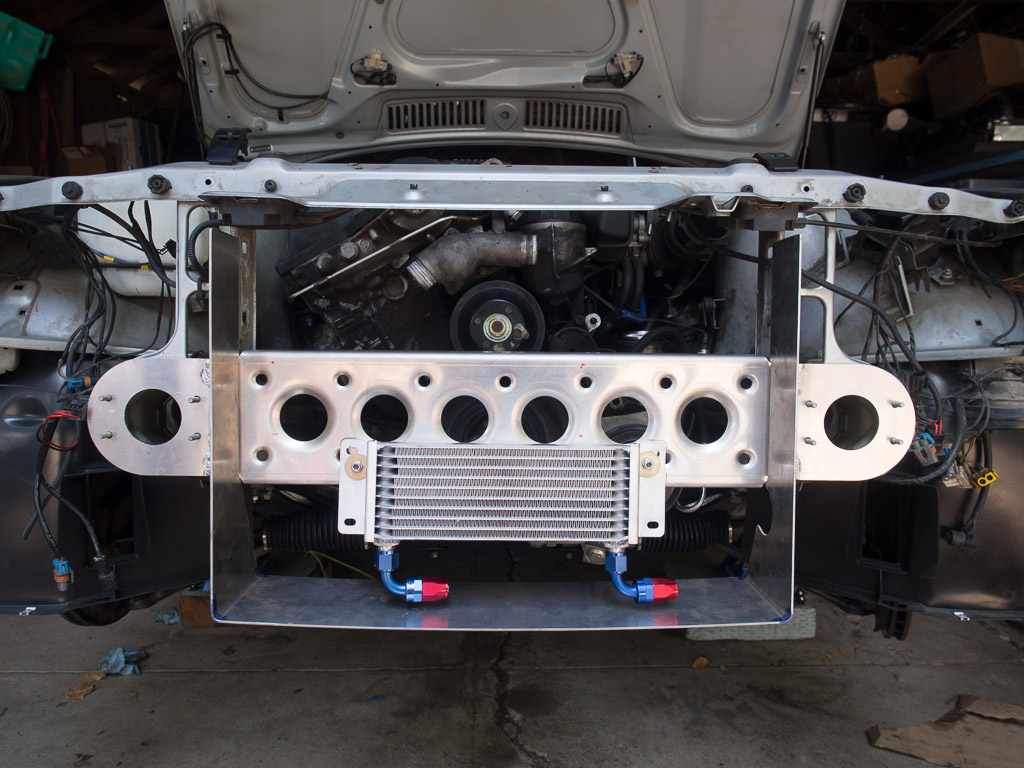
Figure 12
This front aluminum structure will host additional items in the future.
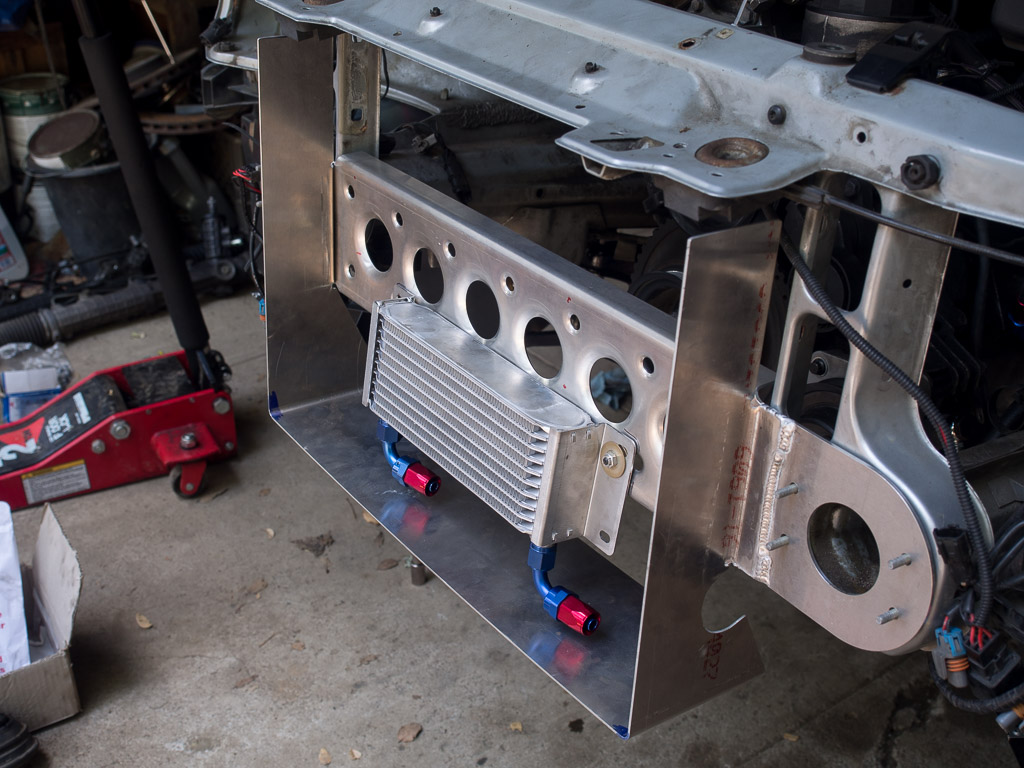
Figure 13
It is likely people will think the car has a turbo. No, just very cool power steering fluid.
The first hose we made was the feed between the reservoir and the pump. This presents an interesting challenge because it needs some flexibility. The engine moves around some as you drive along, so there needs to be slack in that line. It would also be nice to be able to pick the engine up to swap engine mounts or similar, so some slack would be nice for that too. The pump is not gravity fed so strictly speaking the feed doesn't have to be down or straight or anything. We elected to do a feed loop. It seems to make priming kind of a pain, but otherwise works fine. We unbolted the reservoir bracket from the arm and held the reservoir higher when we primed it to make things easier.
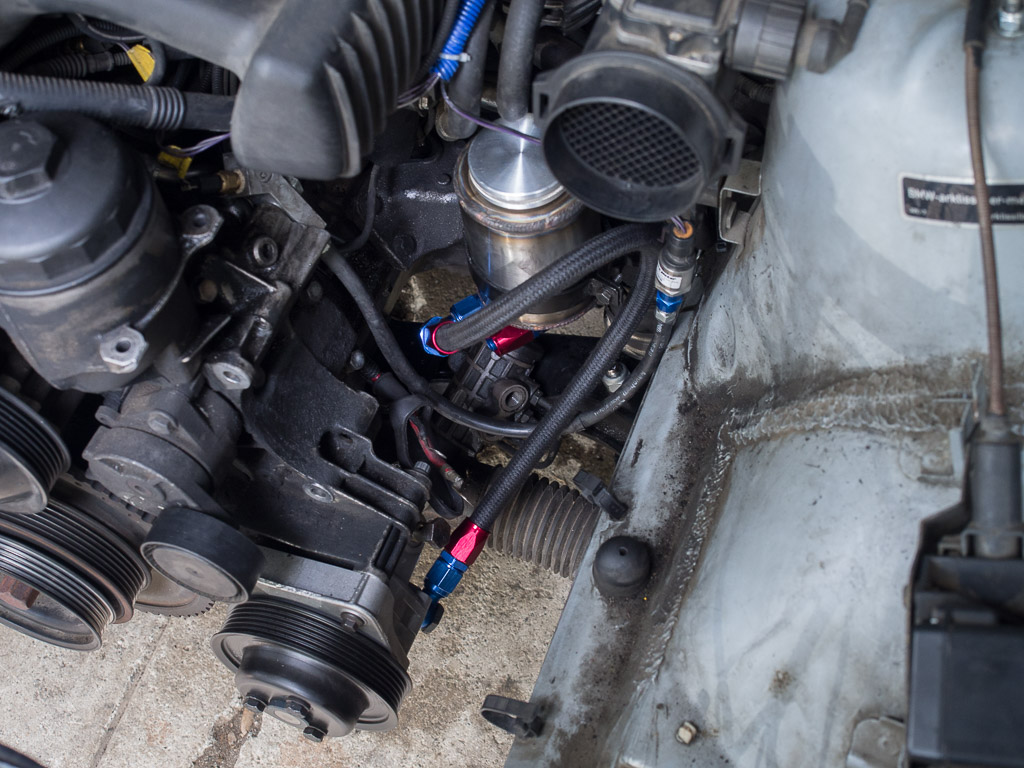
Figure 14
The loop probably made things harder than they needed to be when priming.
The rack was put in the car too and it got some nice fittings and some nice mounting hardware. In many places we replaced stock fasteners with ARP. The 12-point head bolts are especially cool because they allow much more reliable torque to be applied without slipping. Approximating an E-Torx but you can use a standard 12-point socket on them.
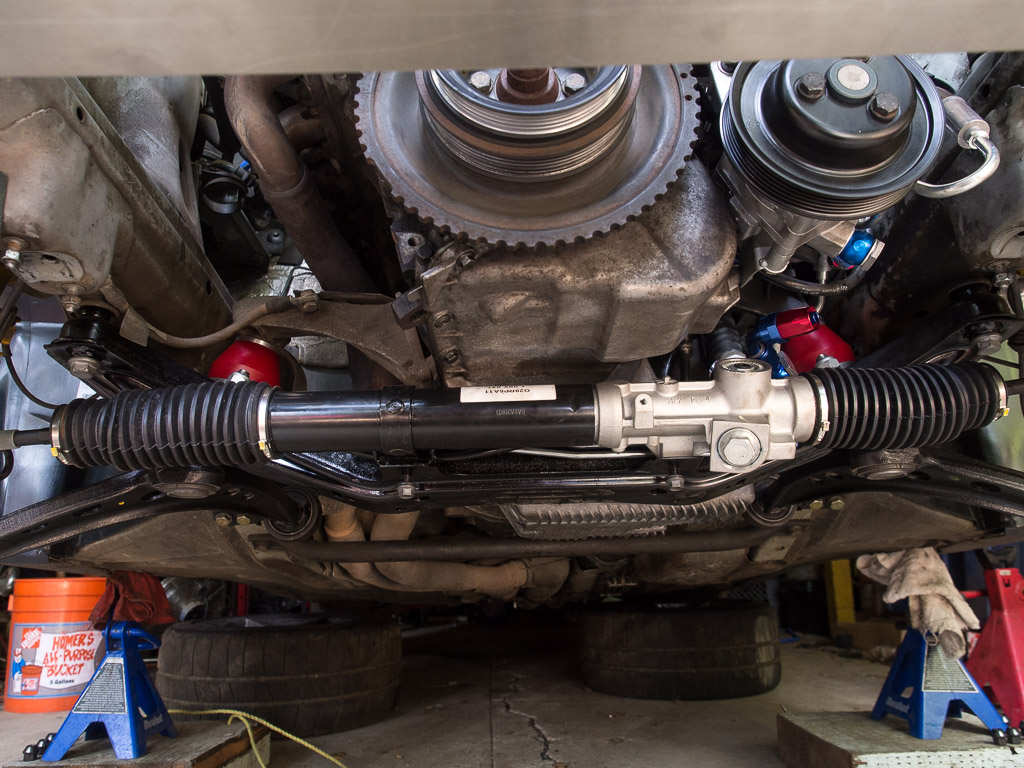
Figure 15
This photo shows the Vorshlag poly engine mounts. These were not as reliable as we had hoped.
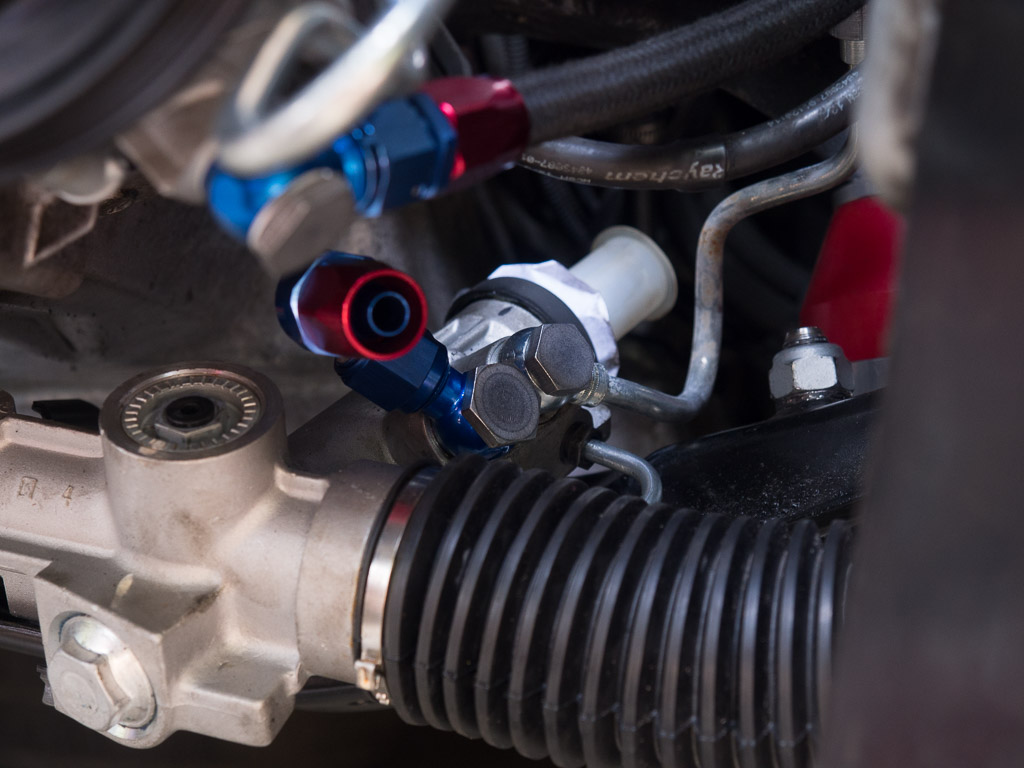
Figure 16
Staying with banjo bolts and AN adapters allowed us to bolt everything together, but keep leak-free connections.
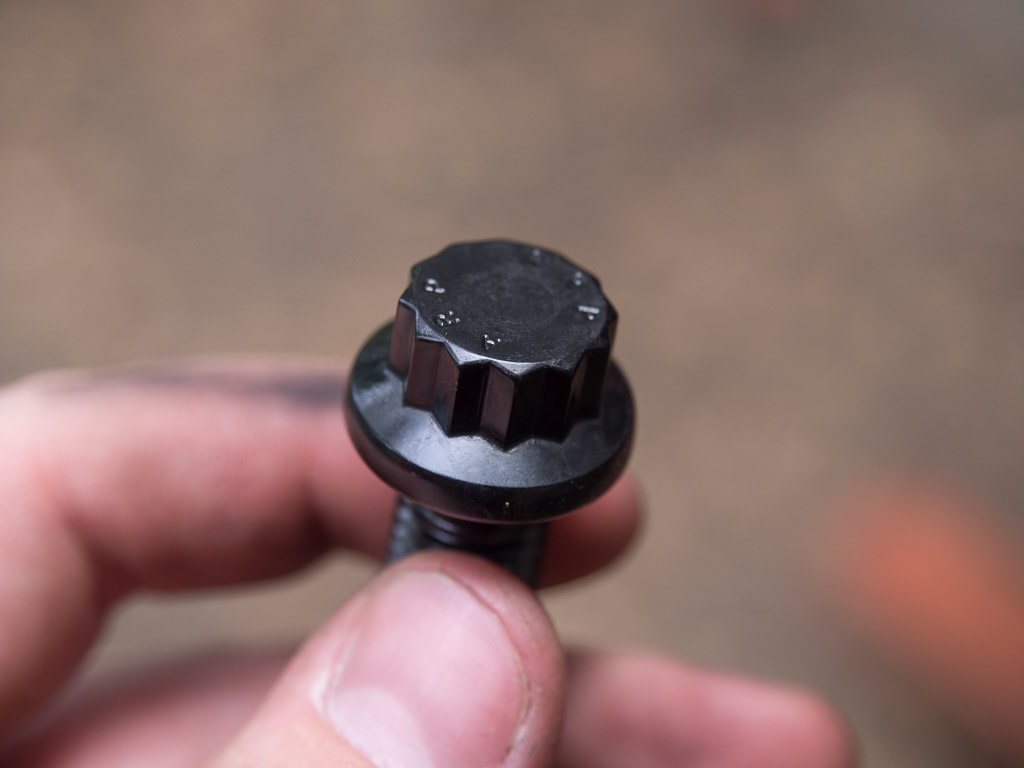
Figure 17
ARP seems to make truly great fasteners. Wish they would print more details on the bolt head, like recommended torque.
The system was fully plumbed and everything mounted up. Another piece had to be made to mount the filter. See the second annotated photo for fluid flow direction. A piece was also made to route the hoses safely through the front ducting.
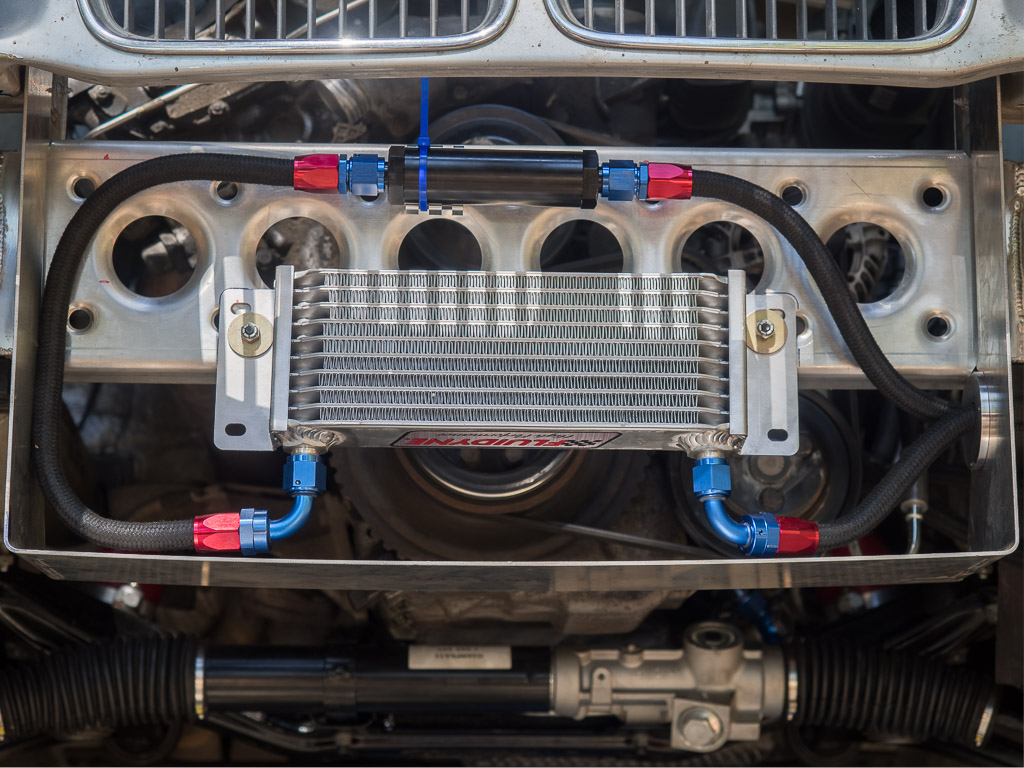
Figure 18
We didn't do nearly as good a packaging job as BMW, it's a much larger system.
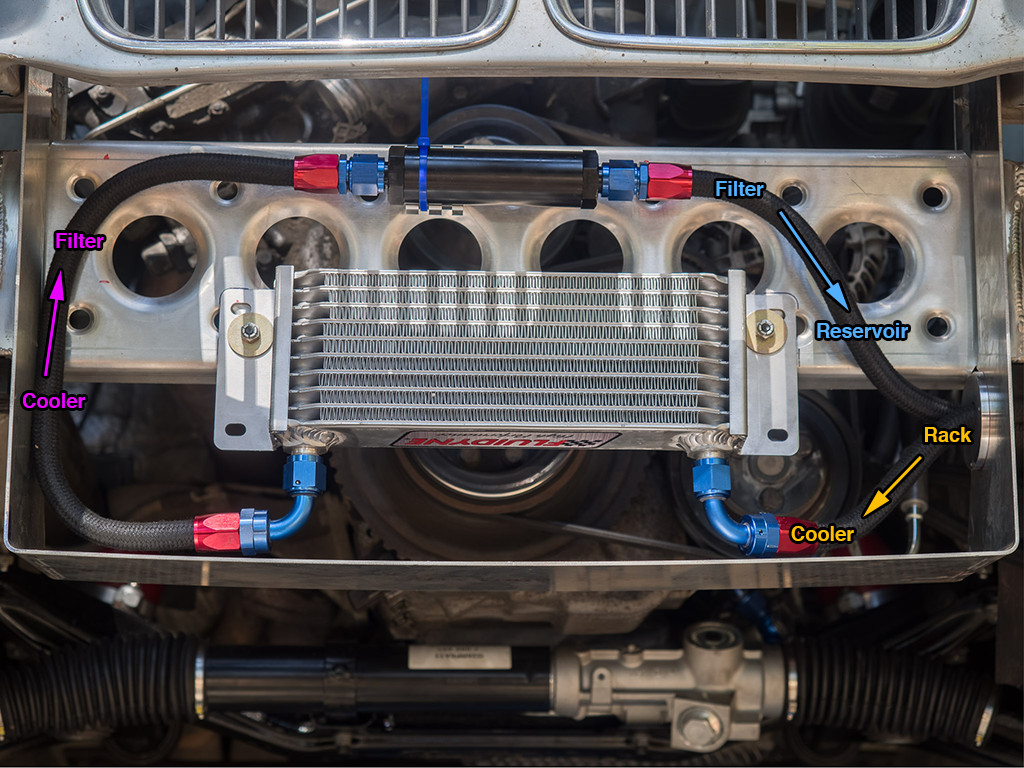
Figure 19
Annotated fluid flow is using consistent colors across images. More below.
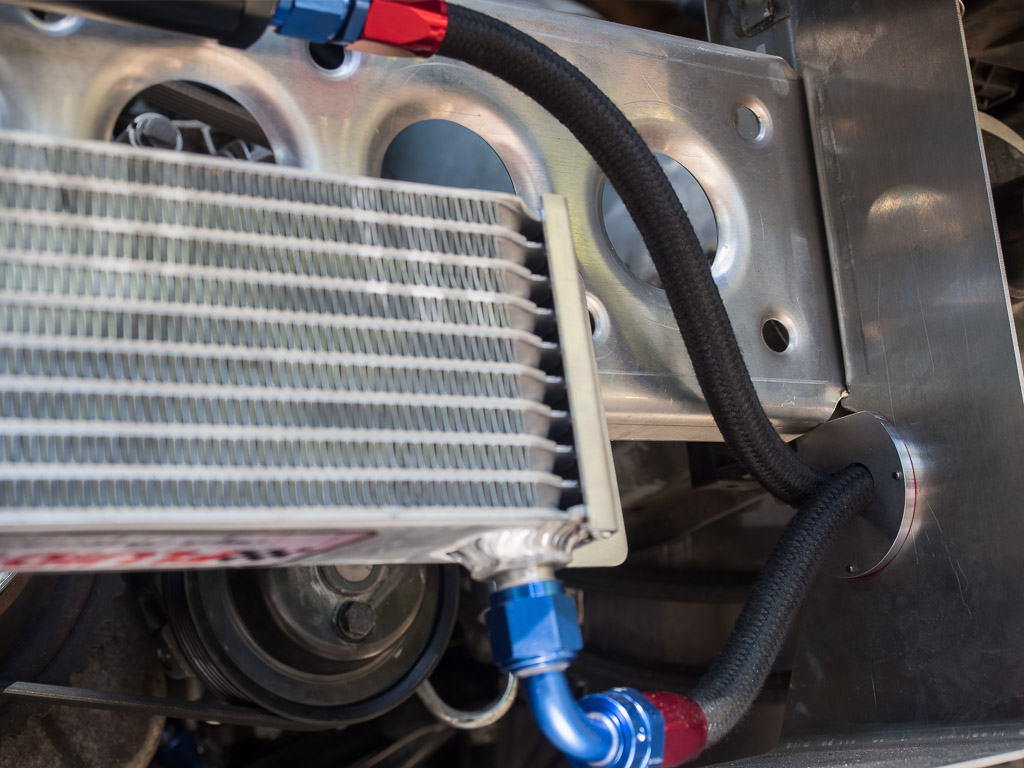
Figure 20
A metal grommet was milled with rounded inner edges to allow the power steering hoses to pass without being cut by the sheet metal edges.
Here is additional detail of the plumbing done for the rack, the front-back runs, and the high pressure/reservoir. Note the annotated versions to indicate hoses and fluid direction.
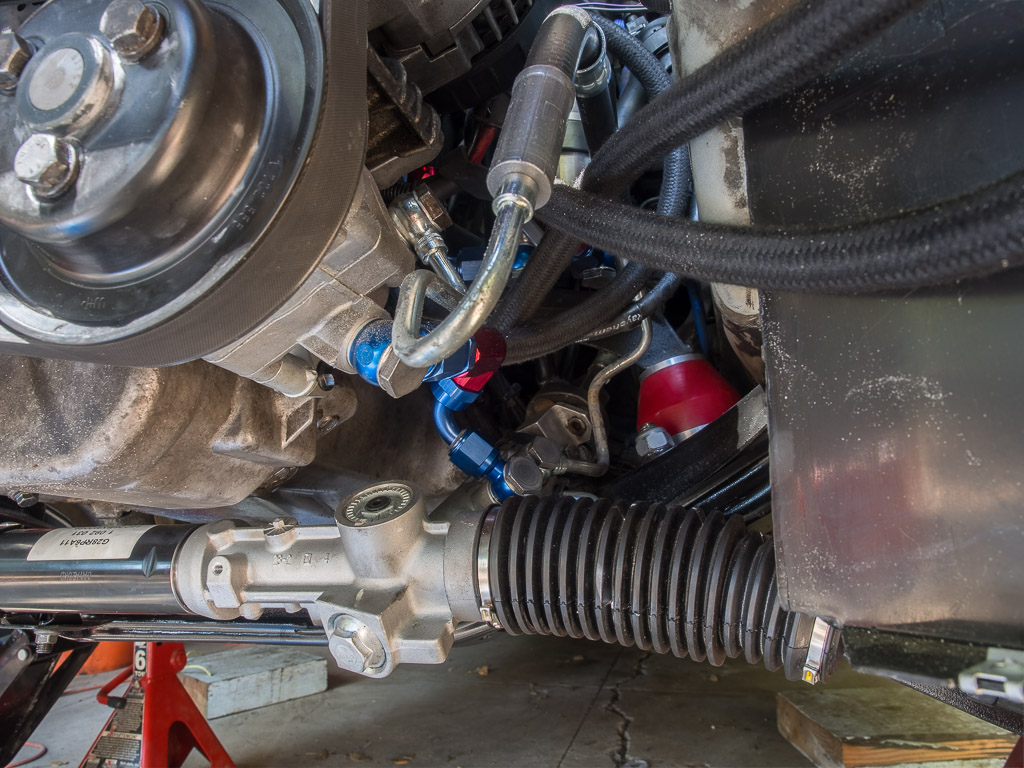
Figure 21
A bit of a rats nest from this angle, in practice it's not so bad when it's clipped in to grommets and zip tied together.
Figure 22
Sometime in the future the oil pressure sender will also be moved and the wire rerouted.
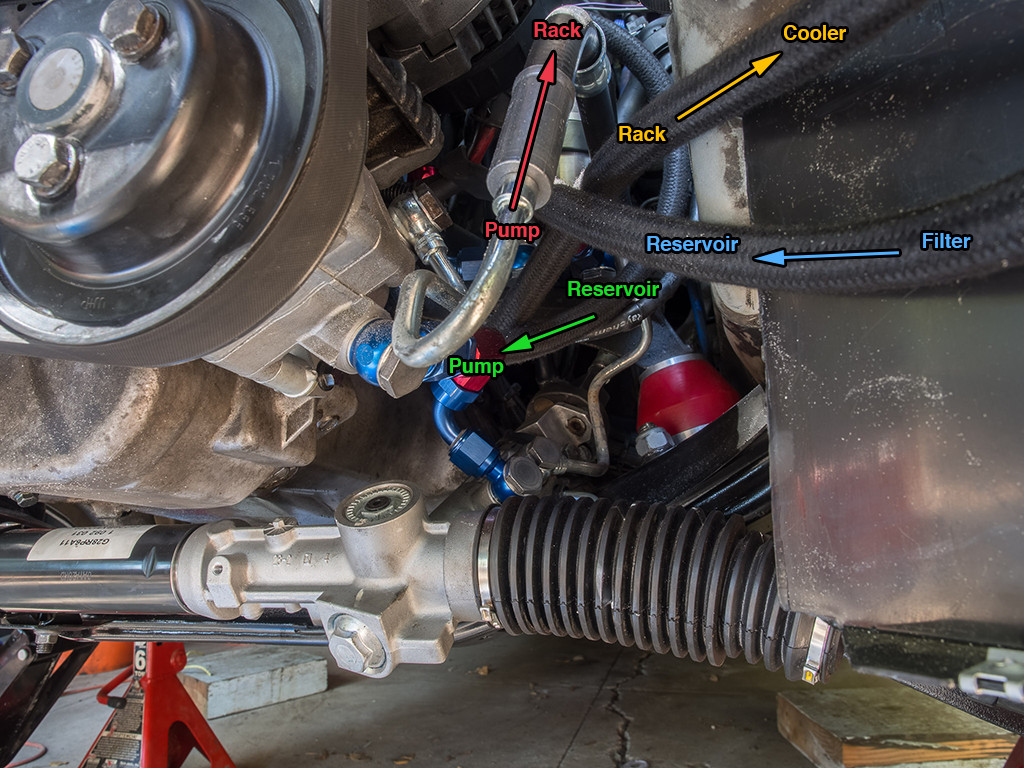
Figure 23
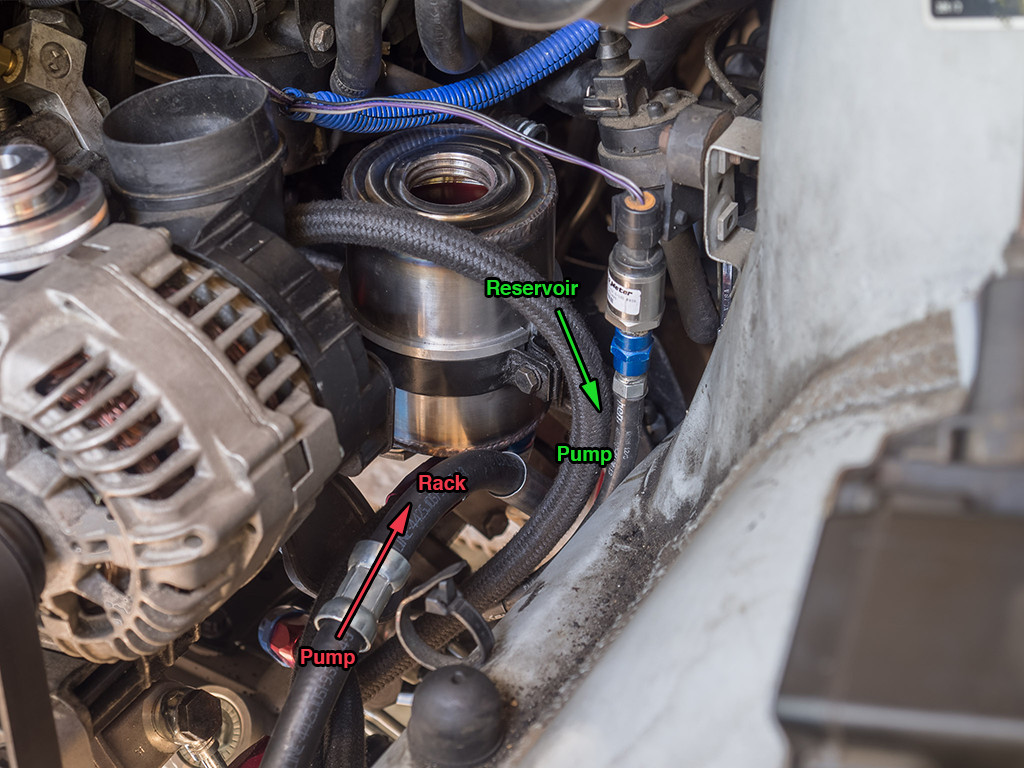
Figure 24
Here is how the reservoir ended up from the bottom view. The rack and new tie rods/control arms. The car got entirely new front end suspension at the same time, can see the rear of the knuckle and all the new fasteners including the new ARP 12-point heads.
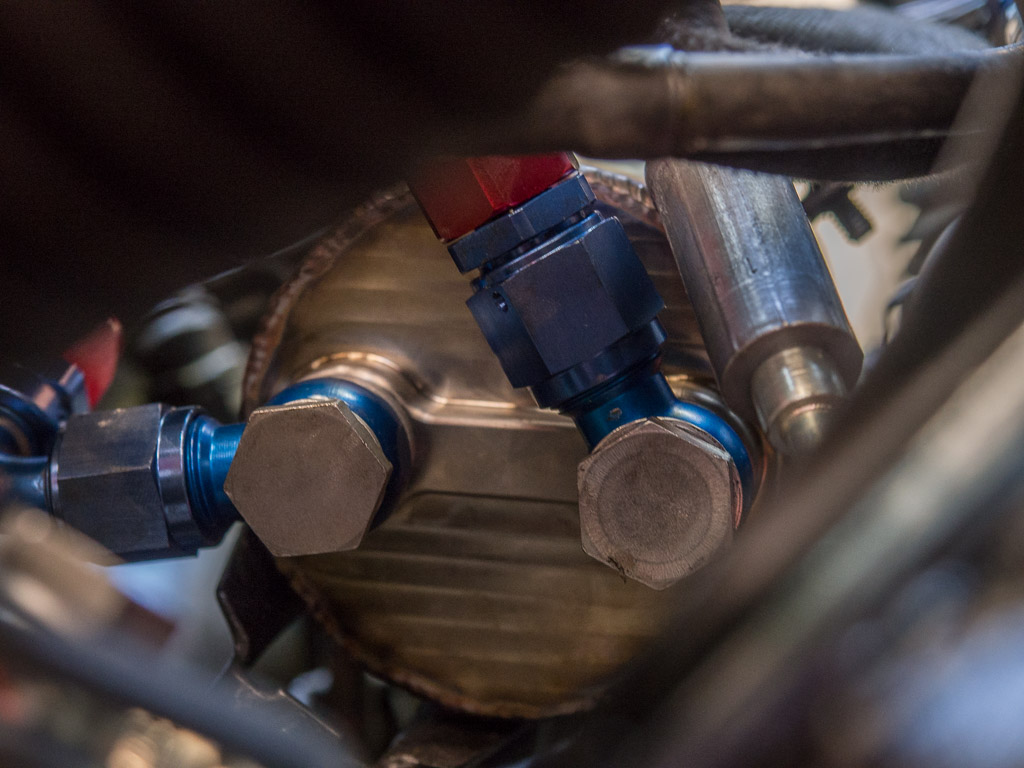
Figure 25
Have to clock everything correctly at install time.
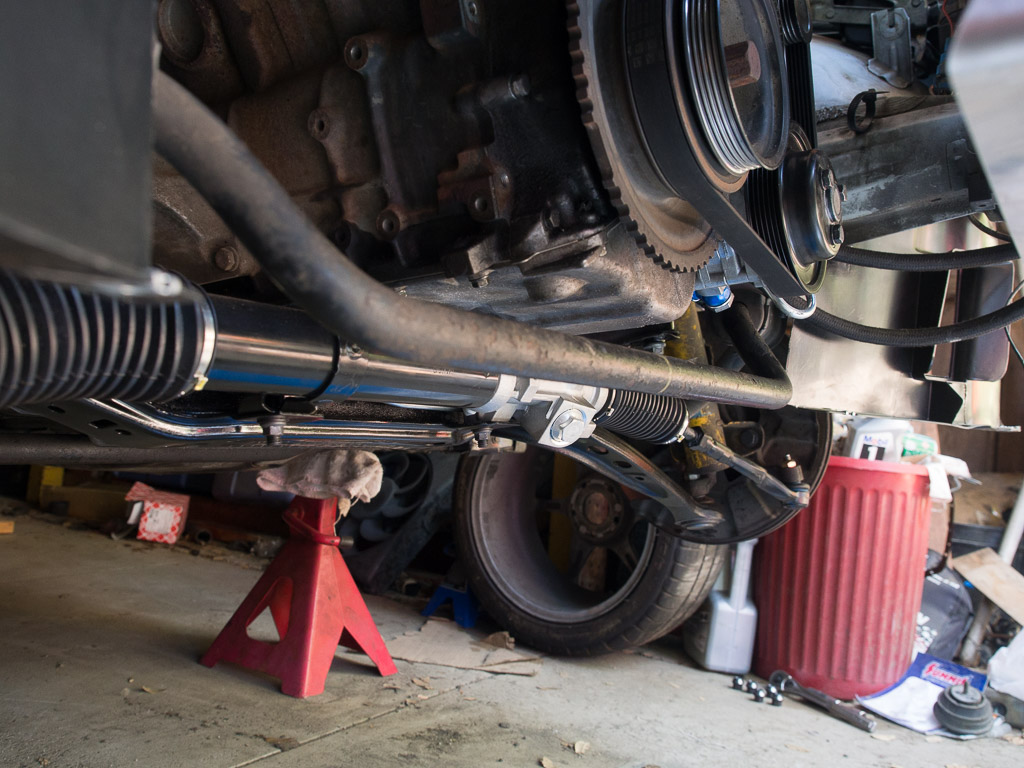
Figure 26
The torque look-up sheet for these big projects gets quite extensive. Lots of bolts to put back correctly.
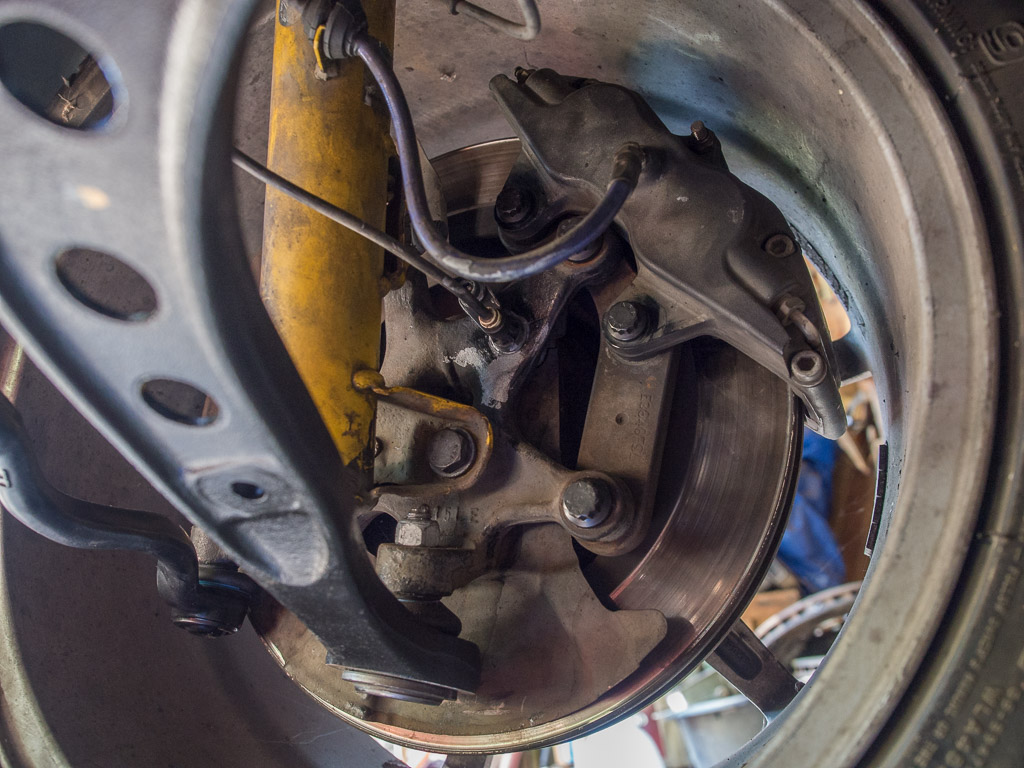
Figure 27
These dampers are custom valved by Bilstein in LA, the calipers are Wilwoods.
The system was filled with Redline D6 ATF, because it is red, and red makes the car faster. Then we primed it, put it on the ground, and it started making bad noises! Oh noes! What horrible mistakes did we make... turns out, the pump was faulty. The service bung on the side was not sealed properly and was sucking in air and leaking fluid. It did not leak fluid until the car was on the ground with a load applied. We consider this a clear failure of the part. The pump is punched next to the hole so the aluminum thread deforms and you cannot remove the bung. Clearly this is not a user-servicable point and of course we did not mess with it. We purchased a new pump with intent to return this one.
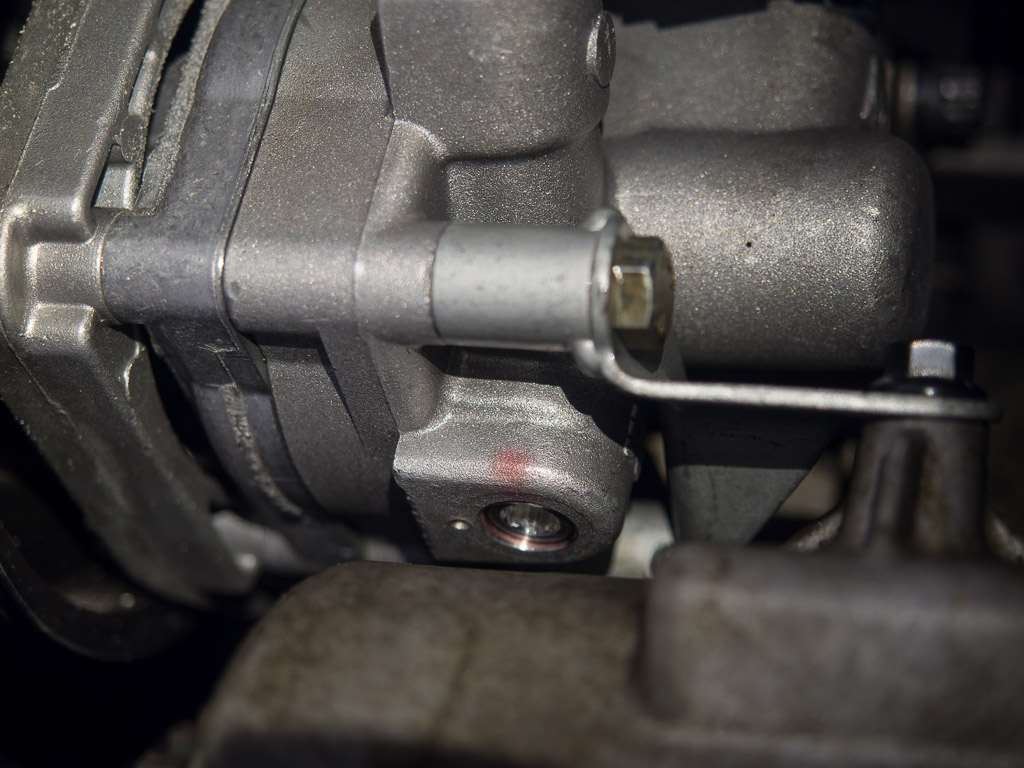
Figure 28
The threads of the service bung are coated in red fluid. It's not a fast leak, but it does build up and drip.
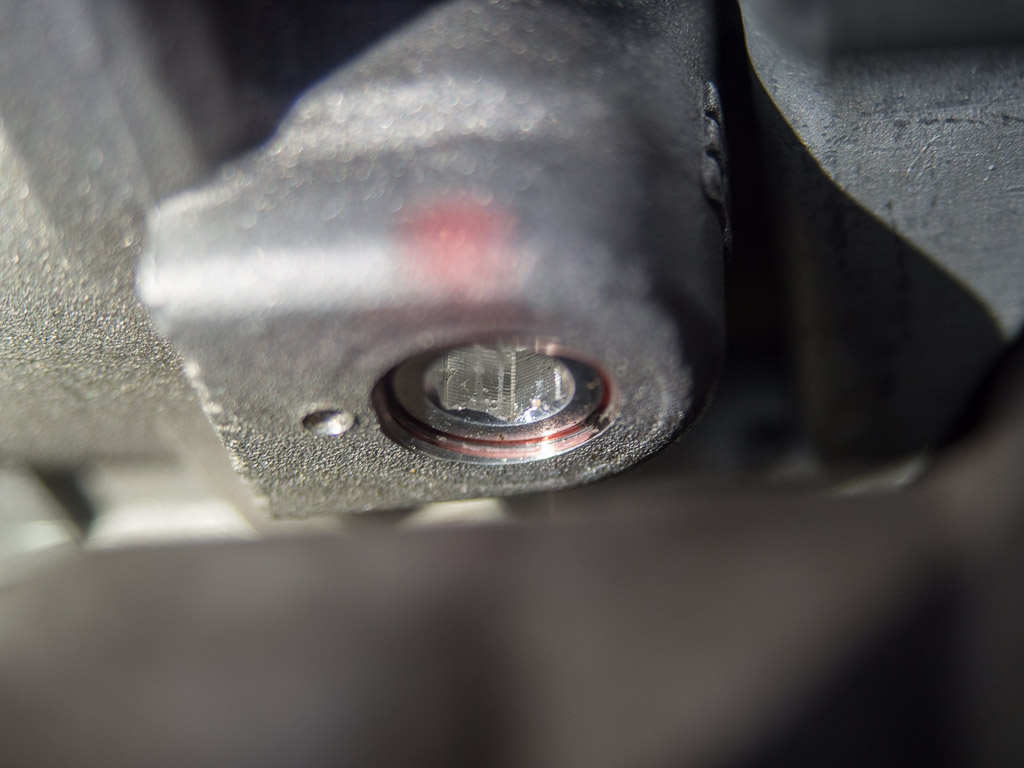
Figure 29
Note the punch mark to the left and deformed threads.
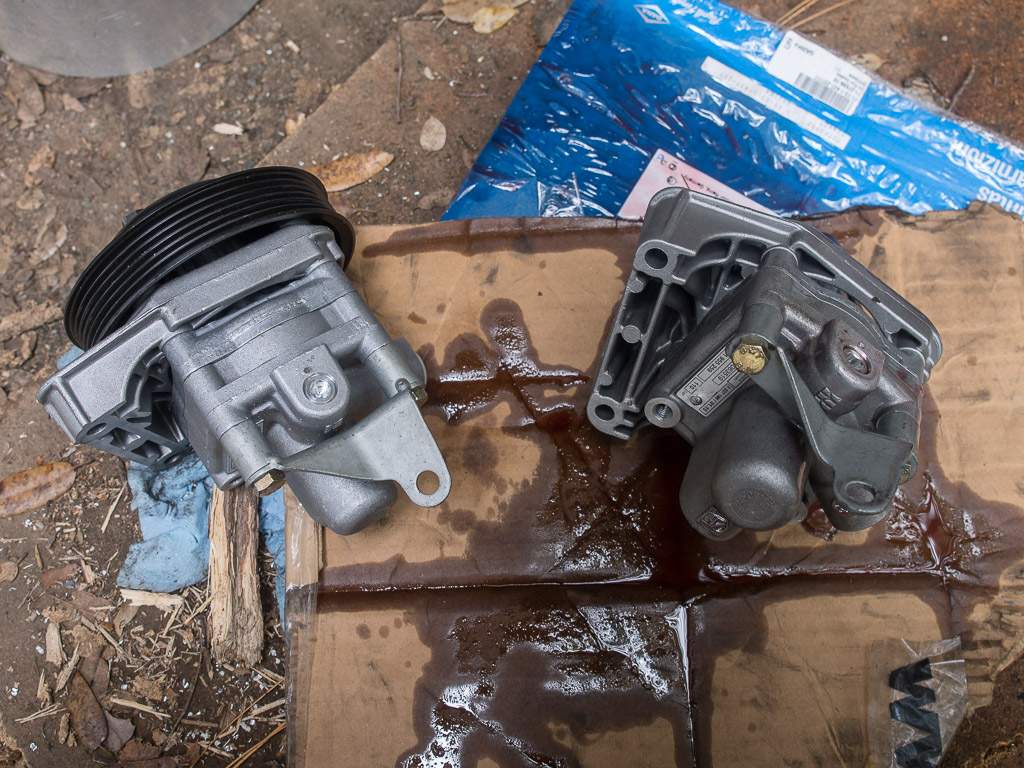
Figure 30
Taking power steering systems apart is a messy job, even when they are brand new.
We drained the system, swapped the pump, got new crush washers, primed it, started it up... no noises, no problems. Took it for a test drive, still great. Not a drop of ATF anywhere outside the system.
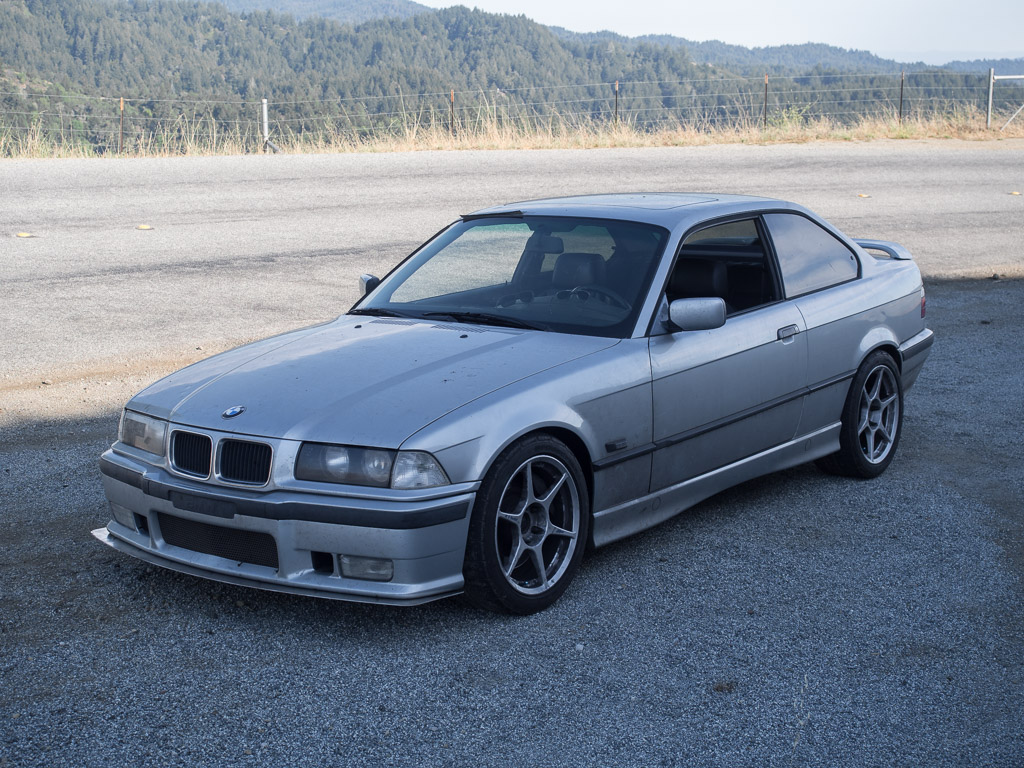
Figure 31
Car works well again, back on the road after the extensive overhaul.
The Z3 rack is not much faster. If you do the math it is something between 5 and 10% faster than stock 328is. In practice, that's about what it feels like too. A bit, but not a lot faster.
Further Notes:
- Some other interesting PS builds can be found here.
- Using braided steel hoses is strictly not necessary for power steering. Braided steel does not increase the pressure holding of the hose. It is a sheathing that exists to prevent abrasion and puncture. It also acts as a file when vibrating and can destroy metal. Use only when needed (in-cabin fluid runs or brake lines).
- The system is noisier in general. Could be a number of reasons for this.
Things that we might do differently next time:
- This cooler is way excessive. A smaller cooler or a custom cooler would be better.
- The filter is too big and the screen is probably not fine enough.
- Not sure if the vertical pump feed loop is wise or the best solution.
Major Parts Reference (part, part details, our source/link):
- BMW Z3 (non-M) Rack: BMW 32-13-1-095-575, Pelican Parts
- High Pressure Line: BMW 32-41-1-141-953, Pelican Parts
- Oil Cooler: Fluidyne DB-30110-8AN, Summit Racing
- Oil Filter: Moroso 23870, Summit Racing
- Hose: 8AN Aeroquip StartLite Aramid Braided Racing Hose, Pegasus Auto Racing
- Hose Ends: Straight and 90º Elbow 8AN Aluminum Swivel Hose End for Steel Braided Hose, Pegasus Auto Racing
- Banjo to AN Adapters: 8AN to 16mm Single Banjo Adapter, Aluminum, Pegasus Auto Racing
- Crush Washers: 14mm BMW 32-41-1-093-596 and 16mm BMW 32-41-1-093-597, Pelican Parts
- Banjo Bolts: 14mm BMW 32-41-6-852-469 and 16mm BMW 32-41-6-852-470, Pelican Parts
- Good Pump: BMW 32-41-2-227-197, Turner Motorsport